Getting Started
This tutorial will guide you through setting up and running the Internal Container Cloud (ICC) locally using the OSS profile.
Prerequisites
Section titled “Prerequisites”- Docker installed and running
- kubectl installed
- helm installed
- k3d installed
- git installed
- psql (PostgreSQL client) installed
- Node.js 20.x or 22.x installed
Installing desk
Section titled “Installing desk”Desk is the tool that allows to install an run ICC locally on your laptop! To install desk globally, follow these steps:
-
Clone the repository:
Terminal window git clone https://github.com/platformatic/desk.gitcd desk -
Install dependencies:
Terminal window npm install -
Install desk globally:
Terminal window npm link
This will make the desk command available globally on your system.
Step 1: Configure Environment
Section titled “Step 1: Configure Environment”Create a GitHub OAuth App
Section titled “Create a GitHub OAuth App”Before setting up the environment, you need to create a GitHub OAuth application:
-
Go to GitHub Settings > Developer settings > OAuth Apps
-
Click “New OAuth App”
-
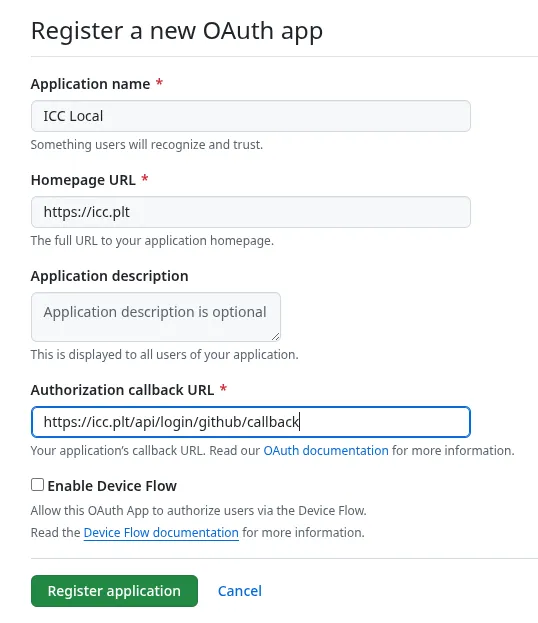
Fill in the details:
- Application name: ICC Local
- Homepage URL: https://icc.plt
- Authorization callback URL: https://icc.plt/api/login/github/callback
-
Note down the Client ID
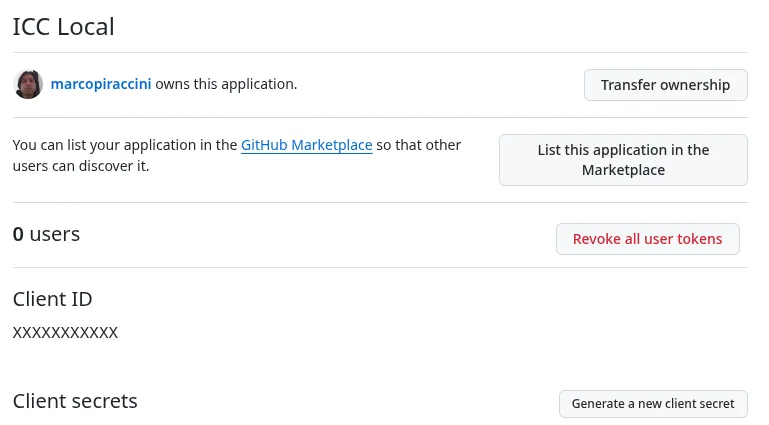
- Click on “Generate a Client Secret” and note down the secret

Configure the .env file
Section titled “Configure the .env file”Create a .env file from the sample template:
cp .env.sample .envEdit the .env file and configure the following mandatory settings:
GitHub OAuth (Required):
GITHUB_OAUTH_CLIENT_ID- Your GitHub OAuth App Client IDGITHUB_OAUTH_CLIENT_SECRET- Your GitHub OAuth App Client SecretGITHUB_OAUTH_VALID_EMAILS- Comma-separated list of admin email addresses. One must match your GitHub account email.
Docker Registry (only required for private images): If using public images (the default for the OSS profile), skip this step.
PULL_SECRET_USER- Your Docker registry usernamePULL_SECRET_TOKEN- Your Docker registry token
Step 2: Start the Cluster
Section titled “Step 2: Start the Cluster”Start the desk cluster using the OSS profile:
desk cluster up --profile ossThis will create a local Kubernetes cluster with k3d and deploy all necessary components.
The creation is done when desk prints out “ICC Ready”:
➜ desk cluster up --profile ossStarting clusterAdding helm repositoriesInstalling helm chartsPreparing database for PlatformaticInstalling Platformatic "oss" profileAdding helm repositoriesInstalling helm chartsWaiting for Platformatic to finish startingMachinist readyICC readyNote: To recreate a running cluster, you need to run
desk cluster down --profile ossbefore runningdesk cluster up --profile ossagain.
To verify everything is running correctly:
# Check all pods across all namespaceskubectl get pods --all-namespaces
# Check the platformatic namespacekubectl get pods -n platformatic
# Watch pod status in real-timekubectl get pods --all-namespaces --watch
To shut down the cluster when you’re done:
desk cluster down --profile ossStep 3: configure /etc/hosts
Section titled “Step 3: configure /etc/hosts”You need to configure your system to resolve these names:
# PLT k3s127.0.0.1 icc.plt127.0.0.1 svcs.gw.plt127.0.0.1 k3d-plt-registry127.0.0.1 prometheus.pltThis works on Linux and OSx, please refer to your OS on how these can be changed
Step 4: check that ICC is up&running
Section titled “Step 4: check that ICC is up&running”Verify that ICC is running logging at https://icc.plt/. You will see nothing deployed:
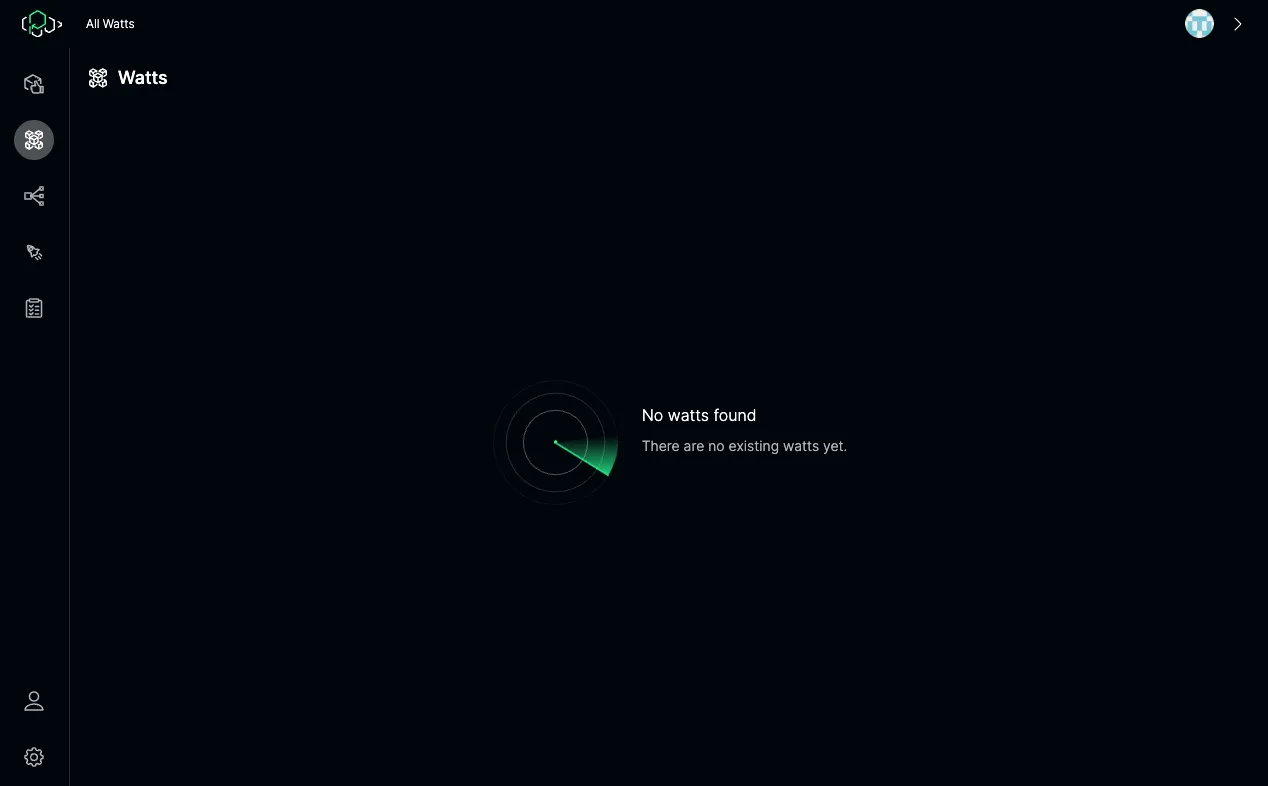
Step 5: Prepare the Application
Section titled “Step 5: Prepare the Application”Now let’s deploy a sample application to test the ICC setup.
You need a Watt application with a Dockerfile. Below is an example:
FROM node:22-alpineENV APP_HOME=/home/app/node/RUN mkdir -p $APP_HOME/node_modules && chown -R node:node $APP_HOME
RUN npm install -g "@platformatic/watt-extra@^1.0.0"
WORKDIR $APP_HOME
# Copy the package.json & lock file first so that they are cachedCOPY ./package.json ./package.jsonCOPY ./package-lock.json ./package-lock.jsonRUN npm ci
COPY --chown=node:node . .
# Default Watt portEXPOSE 3042
# Prometheus port to query metricsEXPOSE 9090
ENV PLT_ICC_URL="http://icc.platformatic.svc.cluster.local"
# Needs to be on all interfaces to be reachable from outside the containerENV PLT_SERVER_HOSTNAME=0.0.0.0
CMD [ "watt-extra", "start" ]
Deploy the application
Section titled “Deploy the application”Use desk deploy specifying the application path:
desk deploy --profile oss --dir APPLICATION_PATHIf you are in the application folder, you can also run:
desk deploy --profile oss --dir .For example:
➜ desk deploy --profile oss --dir .Building plt.localreg/plt-local/w3:1758545473565 from /work/workspaces/workspace-platformatic/test/w3#0 building with "default" instance using docker driver
#1 [internal] load build definition from Dockerfile#1 transferring dockerfile: 639B done#1 DONE 0.0s
#2 [internal] load metadata for docker.io/library/node:22-alpine#2 DONE 0.4s
#3 [internal] load .dockerignore#3 transferring context: 2B done#3 DONE 0.0s
#4 [1/8] FROM docker.io/library/node:22-alpine@sha256:d2166de198f26e17e5a442f537754dd616ab069c47cc57b889310a717e0abbf9#4 DONE 0.0s
#5 [internal] load build context#5 transferring context: 3.13MB 0.5s done#5 DONE 0.5s
#6 [5/8] COPY ./package.json ./package.json#6 CACHED
#7 [6/8] COPY ./package-lock.json ./package-lock.json#7 CACHED
#8 [3/8] RUN npm install -g "@platformatic/watt-extra@^1.0.0"#8 CACHED
#9 [2/8] RUN mkdir -p /home/app/node//node_modules && chown -R node:node /home/app/node/#9 CACHED
#10 [4/8] WORKDIR /home/app/node/#10 CACHED
#11 [7/8] RUN npm ci#11 CACHED
#12 [8/8] COPY --chown=node:node . .#12 CACHED
#13 exporting to image#13 exporting layers done#13 writing image sha256:b5fca3b3e2b07d9a1f6777ddd261e59f1d2babdd3af70c5fe395baccd5d904de done#13 naming to plt.localreg/plt-local/w3:1758545473565 done#13 DONE 0.0s
View build details: docker-desktop://dashboard/build/default/default/qgedm59upn24wx3it67wktdkc
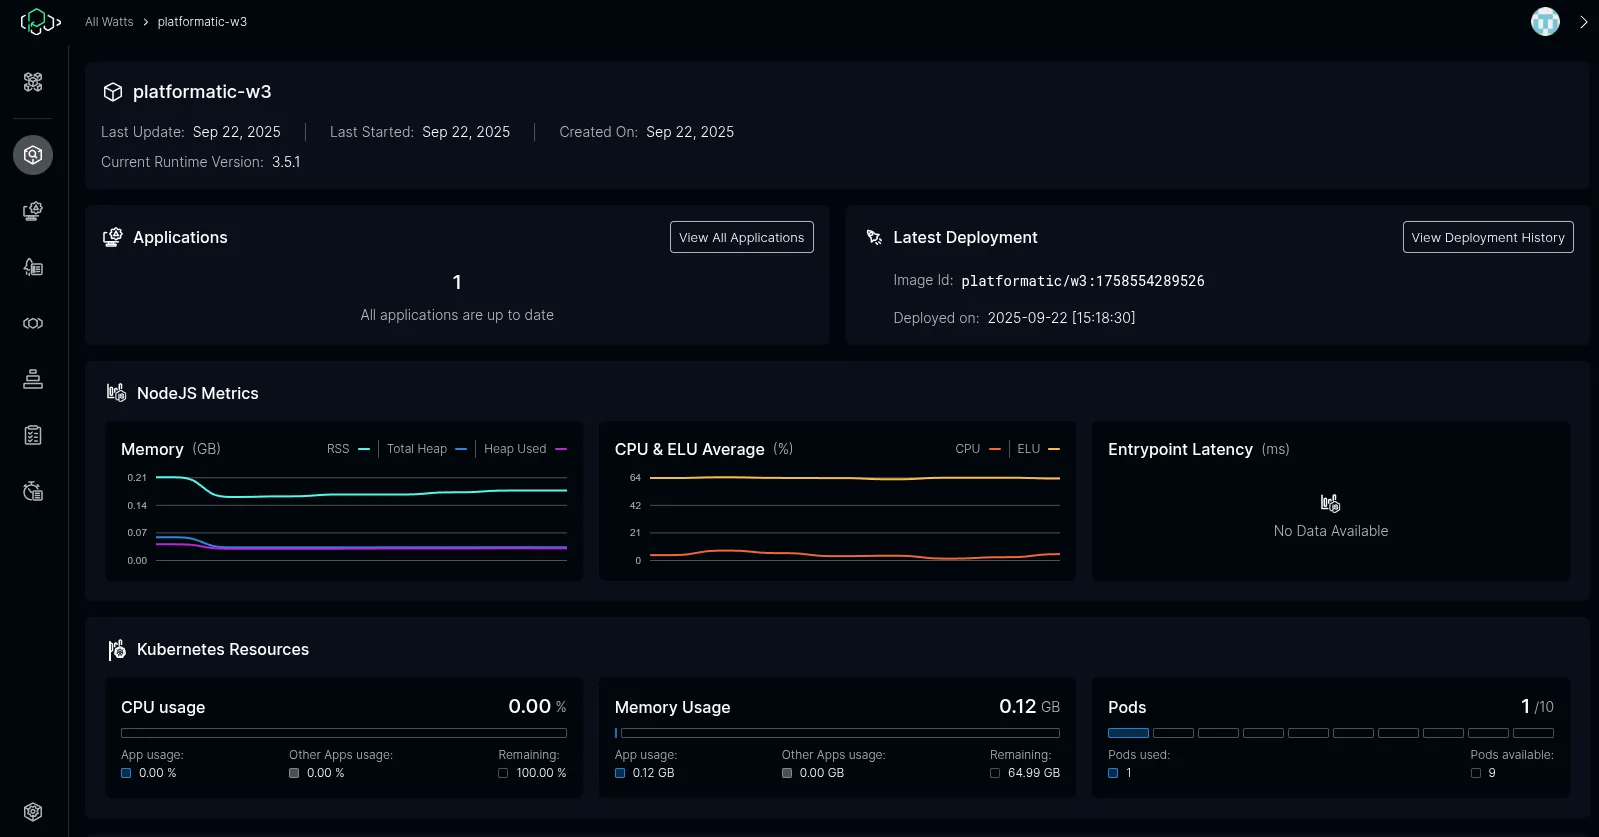
Application deploying. It may take some time to see it available.Application URL: https://svcs.gw.plt/w3/After the deploy is done, the application will appear in ICC. This can take some time, as K8s creates and starts the pod. Then it will be visible on ICC: